Three Ways to Safely Thaw That Bird
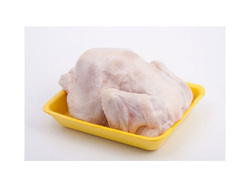
Poultry, chicken and turkey, rival red meats in popularity and pound per capita consumed in the United States. In 2011, people consumed 104.3 pounds per capita for red meat and 100.4 pounds for poultry. The poultry figures break down into 84.2 pounds for chicken and 16.1 pounds for turkey. While the consumption of red meats have dropped 22 percent since 1965, the consumption of poultry has increased by 144 percent. In 2011 people consumed 2.44 times as much chicken and turkey. Almost all the poultry purchased today is prepackaged and frozen and you need to know how to thaw that bird safely.
Thawing at a Safe Temperature.
The temperature of poultry must be kept within the “Safe Zone” while thawing. Thawing meats or poultry products at room temperature by letting them set on the kitchen counter, exposed to the air, for more than two hours places them in the “Danger Zone.” The “Danger Zone” are temperatures between 40 and 140°F (4.4 to 60°C). The “Danger Zone” temperatures are the temperatures at which foodbourne bacteria multiplies rapidly. Any bacteria that was on the meat or poultry at the time it was frozen will start to multiply and spread as soon as the meat or poultry reached 40°F (4.4°C). Freezing does not kill bacteria such as Salmonella, only places it in a hibernating stage.
The Safe Methods for Thawing Meat and Poultry
There are three safe methods for thawing meats and poultry—in the refrigerator, submerged in cold water, or in the microwave. Meats and poultry must be kept frozen right up until you want the thawing process to begin, so, unless you have a freezer large enough to hold your bird, do not buy that Thanksgiving or Christmas turkey early.
Thawing the Bird in the Refrigerator
Thawing a turkey or chicken in the refrigerator is the method of choice for several reason. The prime reason is that poultry thawed in the refrigerator can be safely refroze without having to cook it first. It will be safe when thawed again although there may be a slight loss of flavor and tenderness. A thawed bird can remain in the refrigerator 1 to 2 days before roasting or refreezing.
Thawing a bird in the refrigerator takes a little planning, if the bird is to be ready for stuffing and roasting on the big day. To thaw a bird in the refrigerator, you need to allow 24-hours for each 4 or 5 pounds of weight. Some typical thawing times are:
Thawing a Bird by Submerging it Completely in Cold Water
The cold water method is quicker than the refrigerator method but you need to take a few extra precautions when using this method. First, you must place the bird in a leak-proof plastic bag to keep any foodbourne bacteria from spreading to the countertop and other nearby food products. You also need to use a water tight plastic bag to keep the bird from becoming waterlogged. Second, you must change the cold tap water every 30 minutes so that the temperature does not rise too far into the “Danger Zone.” Third, once the bird is thawed, it must be cooked right away. Typically you will need to allow 30-minutes for every pound. Some typical thawing times are:
This is the least preferred method, even if your microwave oven is big enough to hold the bird. The biggest problem with the microwave method is that the meat may become partially cooked during the thawing process and it is not a good idea to hold partially cooked poultry because the meat has not reached . When using the microwave to that your bird, the bird must be cooked immediately.
Poultry, chicken and turkey, rival red meats in popularity and pound per capita consumed in the United States. In 2011, people consumed 104.3 pounds per capita for red meat and 100.4 pounds for poultry. The poultry figures break down into 84.2 pounds for chicken and 16.1 pounds for turkey. While the consumption of red meats have dropped 22 percent since 1965, the consumption of poultry has increased by 144 percent. In 2011 people consumed 2.44 times as much chicken and turkey. Almost all the poultry purchased today is prepackaged and frozen and you need to know how to thaw that bird safely.
Thawing at a Safe Temperature.
The temperature of poultry must be kept within the “Safe Zone” while thawing. Thawing meats or poultry products at room temperature by letting them set on the kitchen counter, exposed to the air, for more than two hours places them in the “Danger Zone.” The “Danger Zone” are temperatures between 40 and 140°F (4.4 to 60°C). The “Danger Zone” temperatures are the temperatures at which foodbourne bacteria multiplies rapidly. Any bacteria that was on the meat or poultry at the time it was frozen will start to multiply and spread as soon as the meat or poultry reached 40°F (4.4°C). Freezing does not kill bacteria such as Salmonella, only places it in a hibernating stage.
The Safe Methods for Thawing Meat and Poultry
There are three safe methods for thawing meats and poultry—in the refrigerator, submerged in cold water, or in the microwave. Meats and poultry must be kept frozen right up until you want the thawing process to begin, so, unless you have a freezer large enough to hold your bird, do not buy that Thanksgiving or Christmas turkey early.
Thawing the Bird in the Refrigerator
Thawing a turkey or chicken in the refrigerator is the method of choice for several reason. The prime reason is that poultry thawed in the refrigerator can be safely refroze without having to cook it first. It will be safe when thawed again although there may be a slight loss of flavor and tenderness. A thawed bird can remain in the refrigerator 1 to 2 days before roasting or refreezing.
Thawing a bird in the refrigerator takes a little planning, if the bird is to be ready for stuffing and roasting on the big day. To thaw a bird in the refrigerator, you need to allow 24-hours for each 4 or 5 pounds of weight. Some typical thawing times are:
- 4 to 12 pounds 1 to 3 days
- 12 to 16 pounds 3 to 4 days
- 16 to 20 pounds 4 to 5 days
- 20 to 24 pounds 5 to 6 days
Thawing a Bird by Submerging it Completely in Cold Water
The cold water method is quicker than the refrigerator method but you need to take a few extra precautions when using this method. First, you must place the bird in a leak-proof plastic bag to keep any foodbourne bacteria from spreading to the countertop and other nearby food products. You also need to use a water tight plastic bag to keep the bird from becoming waterlogged. Second, you must change the cold tap water every 30 minutes so that the temperature does not rise too far into the “Danger Zone.” Third, once the bird is thawed, it must be cooked right away. Typically you will need to allow 30-minutes for every pound. Some typical thawing times are:
- 4 to 12 pounds 2 to 6 hours
- 12 to 16 pounds 6 to 8 hours
- 16 to 20 pounds 8 to 10 hours
- 20 to 24 pounds 10 to 12 hours
This is the least preferred method, even if your microwave oven is big enough to hold the bird. The biggest problem with the microwave method is that the meat may become partially cooked during the thawing process and it is not a good idea to hold partially cooked poultry because the meat has not reached . When using the microwave to that your bird, the bird must be cooked immediately.

Turkey Basics: Do Not Trust the Pop-Up
A few years ago, I watched my wife as she did our Thanksgiving Turkey. Normally I did all the cooking, but when my stepson and stepdaughter came to visit, she had adopted them during her first marriage, she liked to impress them with her culinary talents. Unfortunately her culinary talents were not one of her forte and watching her do that turkey revealed to me yet another of her culinary foibles, she trusted that pop-up meat thermometer.
I do not know who first came up with the idea of supplying a pop-up thermometer already inserted in a frozen turkey, but it was a great sales gimmick. People passed over better buys just to get a turkey with a pop-up thermometer buried in its breast. You can buy them in packages of three at any supermarket today and insert them in the breasts of any bird, but people still buy the birds where the pop-up were inserted during the processing process.
The Invention of the Pop-Up Timer
It has been almost a half century since that faithful day in the great state of California when the idea for a turkey timer was born. The members of the state's association of turkey farmers were trying to figure out how the Thanksgiving turkey less tough and more popular. The members of the California Turkey Producers Advisory Board knew that turkeys were being overcooked, causing them to come out of the oven dried out and tough. After mulling the problem over for many days the idea of the pop-up timer just popped into their collective minds. Eugene Beal, who died on September 30. 2005, is given the lion's share of the credit for the invention of the pop-up turkey timer. He was a very spry 86-years-old at the time of his invention.
The idea for the built-in pop-up timer actually goes to Leo Pearlstein, an 85-year-old Los Angeles public relations man who specializes in promoting the food industry and was one of the original five members of the turkey board told a reporter from the San Francisco Chronicle, "We were always getting complaints that the turkeys were overcooked. Dry turkeys. They were cooking the turkeys using recipes based on old, tough turkeys." During the boards pondering of the problem, Leo Pearlstein, jumped in and said, 'Why don't we find some sort of gadget, something to stick in (the turkey) and tell when the turkey is done."
Goldy Kleaver, another of the board members fortuitously glance up at the fire sprinkler heads on the ceiling of the board room and realized that the sprinkler heads were triggered by the heat of the flame smelting something inside the sprinkler heads. Partially thinking out-loud, and partly to his fellow committee members, he asked, "Why can't we use that principle in the turkey?"
They spent a year experimenting to find just the right temperature to trigger the pop-up timer, the temperature that produced a juicy, tender bird. Now you have to remember that this was back in the day when foodbourne illnesses like Salmonella were not household words and concerns. The company they formed was called Dun-Rite Company, which, Nan, Beale's widow, sold to 3M in 1973. fifteen years later, in 1988, 3M sold the company to Volk Enterprises of Georgia.
Pop-Up Timers are Inferior to Meat Thermometers
The pop-up timer that comes stuck in the turkey's breast actually adds to the dryness of the white meat and overcooking the bird in general. The hole made in the breast by the pop-up timer allows the continue loss of juices during the cooking process adding to the dryness of the breast's white meat. The pop-up timers are set to pop-up at temperatures between 180 and 185°F (82.2 and 85°C), which is a good 15 to 20°F over the USDA recommended temperature of 165°F. To make things worse, the pop-up timers have been known to pop-up too soon or to never pop-up at all. The extra 15 to 20 degree is really overkill.
An Exception to the Rule
Do you ever want to cook any part of your bird to 180°F? Yes, when cooking a stuffed turkey. When cooking a stuffed turkey, you need to check the temperature in three locations—thigh, breast and stuffing. When inserting the meat thermometer, or the temperature probe if your oven is equipped with one, in the meatiest part of a thigh, making sure the probe does not touch the bone. When the thigh temperature reaches 180°F, move the probe to the center of the breast. The breast temperature of a stuffed bird should be 170°F. Then move the thermometer or temperature probe to the center of the stuffing. Once the stuffing has reached 160 to 165°F, it is time to take the bird out of the oven.
For easier carving and to allow the stuffing temperature to continue to rise to 165°F, let your bird sit for 20 minutes before carving.
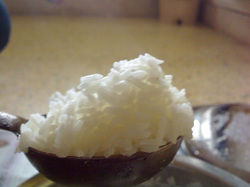
How to Cook Perfect Rice
Rice is a staple in everyone’s pantry and the basic ingredient in many recipes. It is also one of the quickest and easiest foods to cook. It is also one of the easiest foods to ruin during the cooking process. Rice often turns out to be hard and dry on one hand or too mushy on the other. That happens in most cases because beginners follow the instructions on the rice bag and those instructions are all wrong.
Perfect Rice Starts With Selecting a High Quality Rice
Contrary to what many people think, not all rice is the same. For my normal cooking, I prefer Carolina Gold long-grain rice. If I am preparing an Indian or Pakistani dish, I prefer Basmati for its extra long grain and subtly nutty fragrance. For other Asian style cuisine, I prefer Jasmine seductive floral fragrance and translucent grains. Each of these require slightly different preparation and cooking techniques for them to come out properly.
Carolina Plantation Carolina Gold Rice is considered the Granddaddy of all long-grain white rice and it is not cheap nor available in supermarkets. I buy mine online for $17.95 for a 2 pound bag. Perhaps that is a little bit more than your food budget will allow. The good news is that by following the tips that I am about to share with you, you will be able to make perfect rice every time using supermarket quality rice.
Rinse and Soak the Rice Before Cooking
I have yet to find a bag of rice on any supermarket shelf that includes this essential step in the cooking instructions printed on the bag. Rinsing the rice thoroughly before cooking serves several important purposes, two of them are it removes all the loose starches. Removing the excess starch will make the cooked rice less sticky. Rinsing the rice before cooking also removes the talc that many mills outside the United States use in their milling process. With most long grain white rice you can skip the soaking step unless you are working older rice. With old rice, soaking the grains for at least 30 minutes. The soaking makes the grains less brittle and less likely to break. With specialty rices like basmati and jasmine, soaking them 30 to 45 minutes before cooking is essential.
Wash the rice in a fine screened sieve and make sure you drain it thoroughly before cooking or you will be using too much water.
The Pot Really Does Matter
To properly cook rice you need a pot with a heavy bottom and a tight fitting lid. If you are just starting out as a cook, invest in the best pots and pans that your budget will allow because the quality of the meals you turn out is directly related to the quality of your cookware.
There are a plethora of techniques that one can use to cook rice but my favorite, and the one I recommend you use, is the absorption method. With the absorption methods I generally use 1 1/2-cups of water for every cup of long grain white rice. As the rice cooks the water level drops and the captured steam finishes the cooking process, hence the need for a tight fitting pot lid to capture the steam.
How Much Water Should I use?
Actually that all depends on the kind of rice you are cooking and what you want to use the cooked rice for. A rule of thumb when cooking long-grain white rice is to use 1 1/2—1 3/4-cups of water to every cup of rice. Nevertheless you may want to experiment until you find the combination that produces rice exactly as you like it. Reducing the amount of water will result in firmer rice while more water will result in a softer, sticker rice. It all depends on how you want to use the rice. A firmer rice is good for rice salads while a softer, stickier rice is great for stir fries. Long-grained brown rice requires more water than long-grained white rice and short-grain rice requires less.
Time is Important
Bring the rice and water to a boil, stir once and cover the pot with its tight fitting pot lid. Reduce the heat and cook the rice for another 12 minutes over low heat. At the end of the 12 minutes remove the pot from the heat and let stand covered for another 10 minutes to one-half hour. Fluff the rice with a fork before serving.
Practice Makes Perfect
Cooking rice consistently to perfection takes a little practice but if you will follow these steps you will be off to a good start.
Source: Fifty plus years of personal experience
